前端不斷的演進,更講求畫面快速變化,跳脫傳統傳送資料方式,漸漸改為用 javascript 連接,所以,server 端就負責建立 api,透過串接 api 處理資料。
關於 Api, 就有所謂的 RESTful (Representational State Transfer),RESTful 是某種設計架構的稱呼,方便、有彈性的傳輸資料。後面來會用 node.js 搭配 express 架構 RESTful Api,部署到 server 上,建立一個簡單的留言板。
Demo comment board Free Heroku 會 sleep,太慢請 reload
安裝 Node.js express
首先先創建資料夾,npm init 安裝 package.json。
// create file
mkdir nodeapi
cd nodeapi
// install package.json
npm init
// install express
npm install --save express
接下來要開始建立 node.js server
// open package.json & add npm start
...
  "scripts": {
    "start": "node index.js",
    "test": "echo \"Error: no test specified\" && exit 1"
  },
...

// create index.js
touch index.js
建立 nodejs server
以 index.js 作為 node.js server 的起始點,首先引入 express,執行使用 express,這邊先設定好 Port 是 3000,再來建立 get 的 route,路徑是/comments。儲存後執行 npm start,在網址輸入 http://localhost:3000/,這時候會看到畫面顯示 Hello world。
/index.js
const express = require("express");
const app = express();

const port = 3000;

app.get("/", (req, res) => {
  res.sendFile(__dirname + "/index.html");
});

app.listen(port, function () {
  console.log(`server start on http://localhost:${port}, port`);
});
index.html
<!DOCTYPE html>
<html lang="en">
<head>
  <meta charset="UTF-8">
  <meta name="viewport" content="width=device-width, initial-scale=1.0">
  <meta http-equiv="X-UA-Compatible" content="ie=edge">
  <title>Document</title>
</head>
<body>
  <h1>Hello!!</h1>
</body>
</html>
建立 mLab account 創建 mongoDB
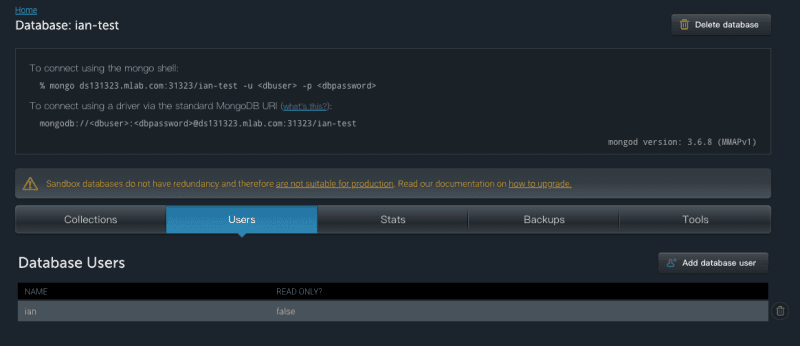
因為我想試試看串接 mongoDB,這邊選用 mLab 來管理 mongoDB,流程大概是進入 mlab 網站,建立帳戶,再來創建 db,點擊建立 User,設定帳號、密碼、權限。
這邊雖然看似簡單但非常麻煩。
記得要 create user,後面會依靠這個 username 跟 password 來串接 mongoDB,我因為打錯 dbName,顯示 MongoError: not authorized on dbname to execute command,大概卡了 40 分鐘…。
首先安裝 mongodb。
npm install --save mongodbindex.js 增加內容
// modify index.js
...
const MongoClient = require('mongodb').MongoClient;

const url = 'mongodb://ian:[email protected]:31323/ian-test';

MongoClient.connect(url, function(err, db) {
    if (err) throw err;
    const dbo = db.db("ian-test");
    const myobj = { name: "john", time: "2018/10/13/00:58", content: "hello, good evening" };
    dbo.collection("comments").insertOne(myobj, function(err, res) {
      if (err) throw err;
      console.log("1 document inserted");
      db.close();
    });
});
...
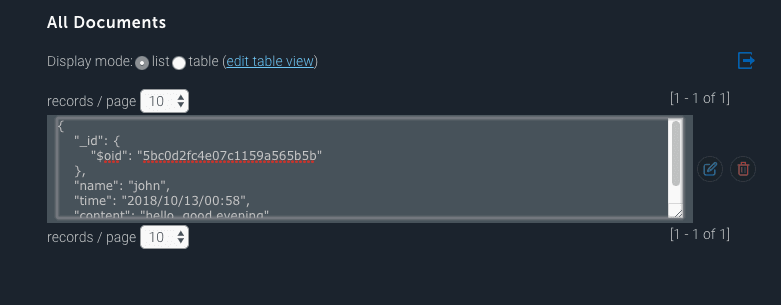
修改完成後輸入 npm start,如果沒出現 error 就可以打開 collection 觀看,會增加一個 comments 的 collection,點開 comments 會發現剛剛 myobj 資料在裡面。這邊是建立資料邏輯,在 RESTful 會用到 Create,剩下更新 PUT、刪除 Delete、讀取 Get 後面再寫上。
POST Api 創建資料
這邊要下載 body-parser 插件,要對資料格式處理,這邊要使用到是 JSON data。在 index.js 引入 body-parser,使用 bodyParser 對資料轉型別成 json type,建立 post 的 route,我們命名路徑為/comments。
npm install body-parser --saveindex.js
...
const bodyParser = require('body-parser');

app.use(bodyParser.json());

app.post('/comments', (req, res) => {
    console.log(req.body);      // your JSON
    db.collection('comments').save(req.body, (err, result) => {
        if (err) return console.log(err)
        console.log('saved to database')
        res.send(req.body);
    });
})

// modify app.listen(3000, () => {});
MongoClient.connect(url, (err, client) => {
    if (err) return console.log(err)
    db = client.db('ian-test')
    app.listen(port, () => {
        console.log('listening on 3000')
    })
})
...
修改完成後重新 npm start,打開 localhost:3000,打開瀏覽器 devtool,在 console.log 貼上這段 fetch post,成功的話會接收到回傳資料,哇嗚,這樣就完成了儲存的 API!!
javascript fetch post
fetch("http://localhost:3000/comments", {
  method: "post",
  headers: {
    Accept: "application/json, text/plain, */*",
    "Content-Type": "application/json",
  },
  body: JSON.stringify({
    name: "mikessss",
    time: "2018/10/13-02:33:01",
    content: "ggggggg.",
  }),
})
  .then((res) => res.json())
  .then((res) => console.log(res));
Get Api 取得資料
我們前面成功的建立了儲存的 api,之後的邏輯都大同小異,接收 request,再依照請求方式跟 mongoDB 連接資料。我們這邊的 get api 會拿整個 comments 的資料,如果看不懂 collection.find(),可以看一下 w3c 的 mongoDB 語法教學,非常簡單易懂。
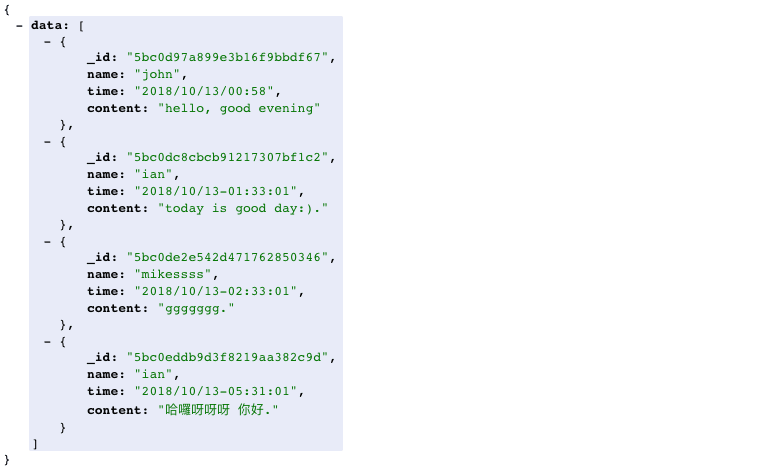
增加完成後,一樣重新啟動,再來載入 http://localhost:3000/comments,就看到我們剛剛儲存進去的所有資料了。
index.js
...

app.get('/comments', (req, res) => {
  db.collection('comments').find().toArray((err, result) => {
    if (err) return console.log(err)
    res.send({data: result})
  })
})

...
Delete Api 取得資料
這邊就建立一個 delete 的網址路徑,我們利用網址:id 來帶參數,方便我們好維運 api。mongoDB 刪除用的是 remove function,假設要用 mongoDB 預設的_id 當作查詢刪除,會多需要使用 ObjectID 處理 value,但如果你是自己用其他物件來查詢,就不用使用 ObjectID。
這邊就不提供 fetch 測試了,推薦使用 postman 測試請求方式,又簡單又快又方便。
const ObjectID = require("mongodb").ObjectID;

app.delete("/comments/:id", (req, res) => {
  // use _id need use ObjectID(value)
  const obj = { _id: ObjectID(req.params.id) };
  db.collection("comments").remove(obj, function (err, obj) {
    if (err) throw err;
    console.log("1 document deleted");
    res.send("delete success");
  });
});
Update Api 更新資料
建立 put 的 route,使用 updateOne 來更新資料,前面兩個參數要帶查詢、更新資料。
這樣就完成了 CRUD 的 API 了,下個步驟會建立簡單的畫面,在部署到 server 上,讓我們可以在畫面操作讀取、建立、更新、刪除資料。
app.put('/comments/:id', (req, res) => {
    console.log(req.params.id, req.body);
    const newvalues = {$set: req.body};
    const obj = {_id: ObjectID(req.params.id)};
    db.collection("comments").updateOne(obj, newvalues, function(err, obj) {
        if (err) throw err;
        console.log("1 document update");
        res.send('update success');
    });
})
localhost api file
部署到 Heroku
部署到 server 上,讓我們未來方便直接串接 api,提醒一下要到 heroku 設定 mLab 的連線,否則會連不到 mongoDB。 (這邊我也卡了 30 分鐘…,安裝 addons 也沒用,是執行下面的 command 才 run 起來)
heroku config:set PROD_MONGODB=mongodb://dbname:password@ds131323.mlab.com:31323/ian-testheroku deploy 流程
//login account
heroku login

//use git
git init
git add .
git commit -m "init node"

// create heroku repo
heroku create

// push remote
git push heroku master

heroku ps:scale web=1

heroku open
再來載入 /comments 路徑,pathname/comments,看到 mongoDB 的資料拉!
大功告成,接下來就處理好前端串接,畫面互動就可以了。
實作頁面
完整程式碼
有問題歡迎詢問,感謝閱讀!!


