一個網站組成主要會是前端加後端,簡單來說,前端主要是畫面加上操作介面,包含了 html、css、javascript,後端則是處理使用者請求控制回應,例如登入註冊,會員後台等等,其中後端有各種語言例如 PHP、Java、ASP.NET、Node.js、Python、Ruby…等等。
在這個前後端分離的時代,多半會再開一台 Node.js 的 server 給前端處理 router,如果有使用到 javascript framework(react、vue、angular),就會需要 server side render,在這邊一同處理畫面跟資料的渲染,而原本的後端則單純負責 api 建立。
這邊就要來使用 Node.js 搭配 express 以及 MySQL 來建立簡單的網站 router。
express 建立 router
1.首先建立資料夾、建立 package.json
// create folder and movein create package.json
mkdir node-express
cd node-express
npm init -y

//install express
npm install express --save
2.建立 app.js
// use express method
var express = require("express");
var app = express();

// use express get method
// create root router and print hello world
app.get("/", function (req, res) {
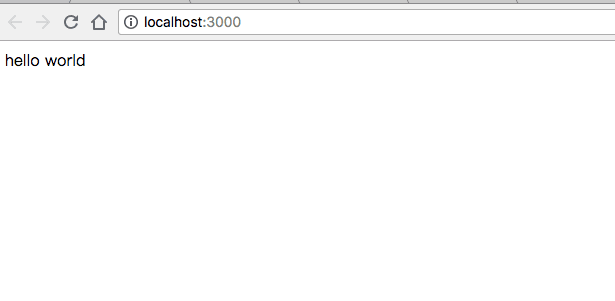
  res.send("hello world");
});

// check running enviroment
var port = process.env.PORT || 3000;

// create
app.listen(port);

// only print hint link for local enviroment
if (port === 3000) {
  console.log("RUN http://localhost:3000/");
}
express get express listen express METHOD
3.執行 app.js、打開 http://localhost:3000/ 打開 command 輸入 node app.js 執行檔案
node app.js
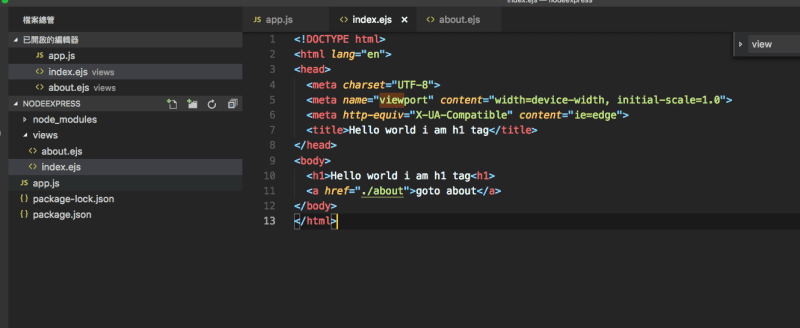
4.建立對應 html 檔案搭配動態 router
這邊用到的是 ejs template,方便我們之後取用 node.js 傳遞的資料。
// install ejs
npm install ejs-locals --save// create ejs
var engine = require('ejs-locals');
app.engine('ejs',engine);
app.set('files','./files');
app.set('view engine','ejs');
...
// modify router use file name
app.get('/', function(req, res){
res.render('index');
});
app.get('/about', function(req, res){
res.render('about');
});
輸入完成一樣執行 node app.js,就完成有對應檔案的 router。

串接 MySQL
再來讓我們試著串接 MySQL,做一個完整的後端服務。如果你的電腦沒有安裝 MySQL,要記得先安裝好,mac 安裝 mysql 教學、windwos 安裝 mysql 教學。 ps.mysql 記得安裝 5.7 以下版本,剛剛跑一遍下載到 8.0.x 版本的,sequel pro 連接出一堆問題,也許是不支援新版的。
1.安裝 MySQL for node.js
// install MySQL tool
npm install mysql --save
express with mysql node.js mysql
2.在 MySQL 建立資料、透過 express 連接 sql

...
var mysql      = require('mysql');

// connect MySQL
var connection = mysql.createConnection({
  host     : 'localhost',
  user     : 'root',
  password : '',
  database: 'test'
});

// select MyGuests table and print all colums
connection.query('select * from MyGuests', function(err, rows, fields) {
  if (err) throw err;
  console.log('The solution is: ', rows);
});
執行 node app.js 會看到印出資料,這樣就成功地在 express 連接到 MySQL 了,接下來就要把這個資料加到 express 的 router 中,讓我們在頁面中可以使用資料
3.把剛剛 sql 的資料設定到 about page
// create object
var data = {};
connection.query("select * from MyGuests", function (err, rows, fields) {
  if (err) throw err;
  // set data to object
  data.user = rows[0];
});

app.get("/", function (req, res) {
  res.render("index");
});

app.get("/about", function (req, res) {
  // add data property to about page
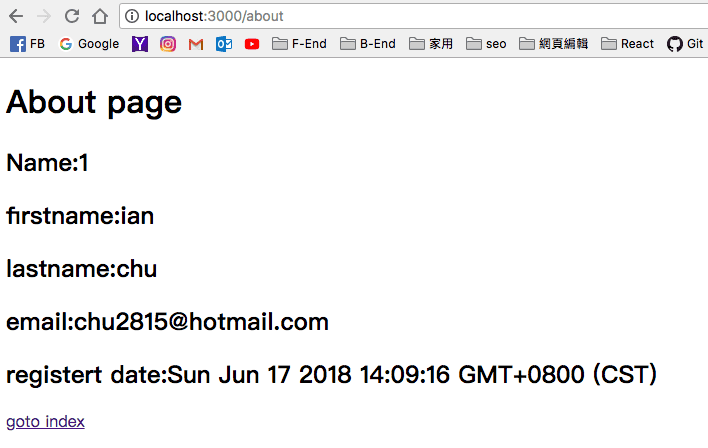
  res.render("about", { data: data.user });
});
4.修改 about.ejs 使用設定的 data
    <h2>Name:<%- data.id %></h2>
    <h2>firstname:<%- data.firstname %></h2>
    <h2>lastname:<%- data.lastname %></h2>
    <h2>email:<%- data.email %></h2>
<h2>registert date:<%- data.reg_date %></h2>會發現到頁面拿到了 MySQL 的資料,這樣就完成了很基本的一個後端架構。
部署 Heroku
再來把剛剛寫好的 node.js 部署到網路上面,heroku 有免費使用的方案,所以這邊使用的是 heroku。
首先要安裝 heroku cli,再來註冊帳號,在專案內的 package.json 加入”start”: “node app.js”,新增檔案 Procfile。
// file package.json

  "engines": {
    "node": "6.2.2"
  },
  "scripts": {
    "start": "node app.js",
    "test": "echo \"Error: no test specified\" && exit 1"
  },

// file Procfile
web: node app.js
開始準備部署作業
//login account
heroku login

//use git
git init
git add .
git commit -m "init node"

// create heroku repo
heroku create

// push remote
git push heroku master

heroku ps:scale web=1

heroku open
完成部署之後就可以看到剛剛的內容了。
實際上檔案架構應該要分離,這邊為了快速 demo 以及簡單化,所以全部操作都寫在一個檔案,應該要分離 router、MySQL 的邏輯,然後引入其他工具方便我們操作。讓架構比較清楚也比較好管理。日後再好好的處理一版。
之後應該會考慮用 mongoDB,不用人人本地端要安裝 MySQL。然後寫 api 做出 CRUD,再搭配 node.js 或是 next 做 Server side render。


